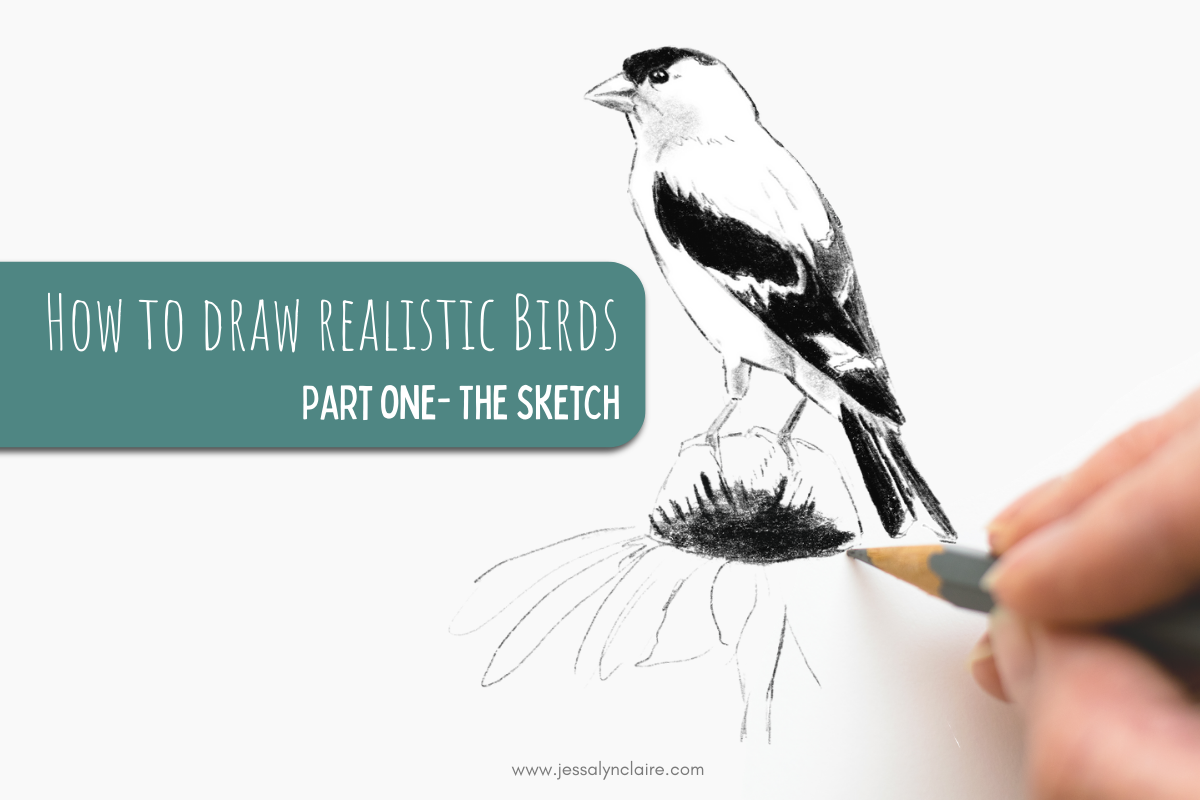
How to Draw Realistic Birds- Part One- Starting with a Sketch

How to Draw Realistic Birds- Part One
This post may contain affiliate links. If you use these links to buy something I may earn a commission at no additional cost to you. Thanks.
Drawing skills are the foundation of any art practice. Knowing how to draw opens a world of possibilities on which to build your creativity. That is because the basis of great drawing skills is observation. In order to draw well (realistically), we have to draw accurately. Drawing accurately means obeying the rules of nature, tapping into the way the brain works, and knowing where it sometimes steers us wrong.
First of all, what do we mean by realistic?
How to Draw Realistic Birds- Part One- Sketch
Have you ever seen a drawing or a painting that looks so real that you can’t tell whether it is a photo or an artwork? That is probably what is conjured for many people when they envision realistic art. And it’s true, that is realistic. In fact, it is so much so that it is called photo-realistic, or hyper-realism. But that isn’t the only type of realistic artwork. For this lesson it is important to realize that when the word realistic is used, what I mean is “accurate”.
Are the proportions accurate? Is the head the correct size for the body? Is the tail the correct length, the wing the right length? Does it have the identifying marks of the bird that we are using as a reference. Have I created a sense of form (3D) by adding shadows and highlights strategically? Basically, does this look like the thing I am trying to draw?
(Psst… you can download the FREE How to Draw Realistic Birds- Part One PDF below!)
Step one: Basic Map Sketch
The drawing will be done in two parts, starting with a sketch. While teaching children this process, in order to illustrate the important purpose of a sketch in realistic drawing, I began to call this step a “basic-map-sketch”. I call it “basic” because it begins by using basic shapes that you already recognize and understand very well to build the overall structure of your drawing. I call it a “map-sketch” because it does for us as artists, what a map does for a traveler. If I’m going somewhere I’ve never been, I don’t simply take off and start guessing which direction to go. I get out a map, look at all of the lines and angles, and get a sense of the picture as a whole to understand where I am going and then I start. To start off with guesses would take longer, involve more mistakes and it’s likely to require turning around and going back a few times.
Think about your sketch as a safe place to make mistakes. The sketch is the place that we slow down, engage our brains and rework as much as necessary until we get things correct. There are two common downfalls in drawing. The first is impatience. For many of us, a sketch is tedious and delays the gratification of seeing a drawing come to life. There is a tendency to rush through the preliminary parts of our drawing, that include the important element of accuracy, to move to the more satisfying parts. The second is the fear of mistakes. For many of us there is the pressure to get things “right”. Oddly, the idea that we cannot make mistakes in our process can create the temptation to leave marks the page that are not correct, simply because they were the first marks we made.
Going into the sketch portion of your drawing with the expectation to make “mistakes” takes the pressure of perfectionism out of the picture. It is difficult to be willing to erase a mark you’ve lovingly placed, but be willing to change it and work at it until it is right.

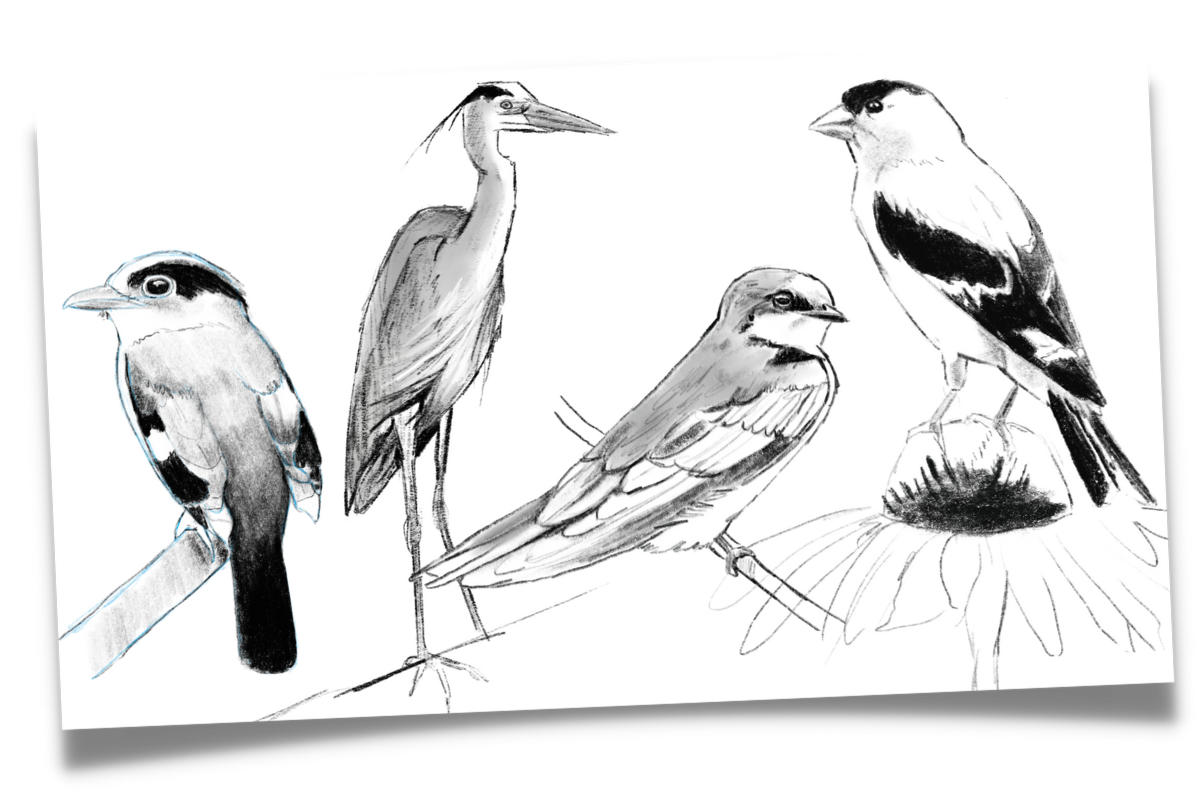
Learn to see the basic shapes
First let’s have a quick practice at seeing the basic shapes within a bird. (Animated GIF of appearing shapes over bird image, take away image) It may take some imagination and practice for this to become a natural process, but over time it will become more second nature to break down a complicated shape into smaller, more basic parts to see the structure. Remember, you’re not looking to fit your bird sketch into a mold with a certain type/number of shapes. What you’re really doing is attempting to make connections in your brain between what you are observing and pieces of information you already have. It sounds a bit unbelievable, but by making these simple comparisons such as, “The head reminds me of a circle.” it creates new connections in the brain and your ability to see the object in front of you with more accuracy will increase.


Step by step sketch
STEPS 1-7

Posture line: Start by sketching a line at the angle of the posture of the body. The oval we will draw for the body will be drawn on top of this line. Do not try to draw the angle of the bird overall, focus on the angle of the largest portion of the body. The head will often be set at a completely different angle. This line helps ensure you sketch the overall shape in the correct position.
Circles: Visualize the circular shape of the body and head. Pay close attention to the size comparison between the two body parts. You do not have to over generalize the circle shape. The aim isn’t to over-simplify the structure into simple shapes, the aim is to make connections between shapes you already recognize and the shape you are trying to observe.
The beak line: The next trick is a great example of how knowing the way nature behaves can make us better artists. In many birds, and most songbirds, if you were to visualize (or sketch) a line where the top and the bottom of the beak meet and continue it out the back of the head, you will find that the eye will sit right on this line. The second benefit of this line is that it shows clearly how the bird’s head is tilted. These small details of angles can trip up an artist. It is the sort of small detail that causes that sensation of something being “off” in your finished drawing, but often not obvious enough to know what exactly it is that looks wrong.
Then draw the beak around that line, paying close attention to the size and shape of the beak. Is it short and fat? Skinny and sharp? It is important to notice that unless the bird is facing directly to the side, the beak shape WILL cross over and into the circle you’ve drawn for the head. You will see illustrated or simplified birds with a v-shaped beak popped right on the side of the head, but in real life birds are more often looking toward or away at an in-between angle. Add the eye sitting just on top of the line you’ve created, trying to study the shape, and the distance between the beak and eye closely.
Wing shape: As seen above, many wings can be simplified into one or more v-shapes or triangles. Estimate the length of the wing the best you can, realizing that as you add information to your drawing, it will become more clear whether you have accurately estimated the length. The wing is an area where I often have to make changes at a later stage.
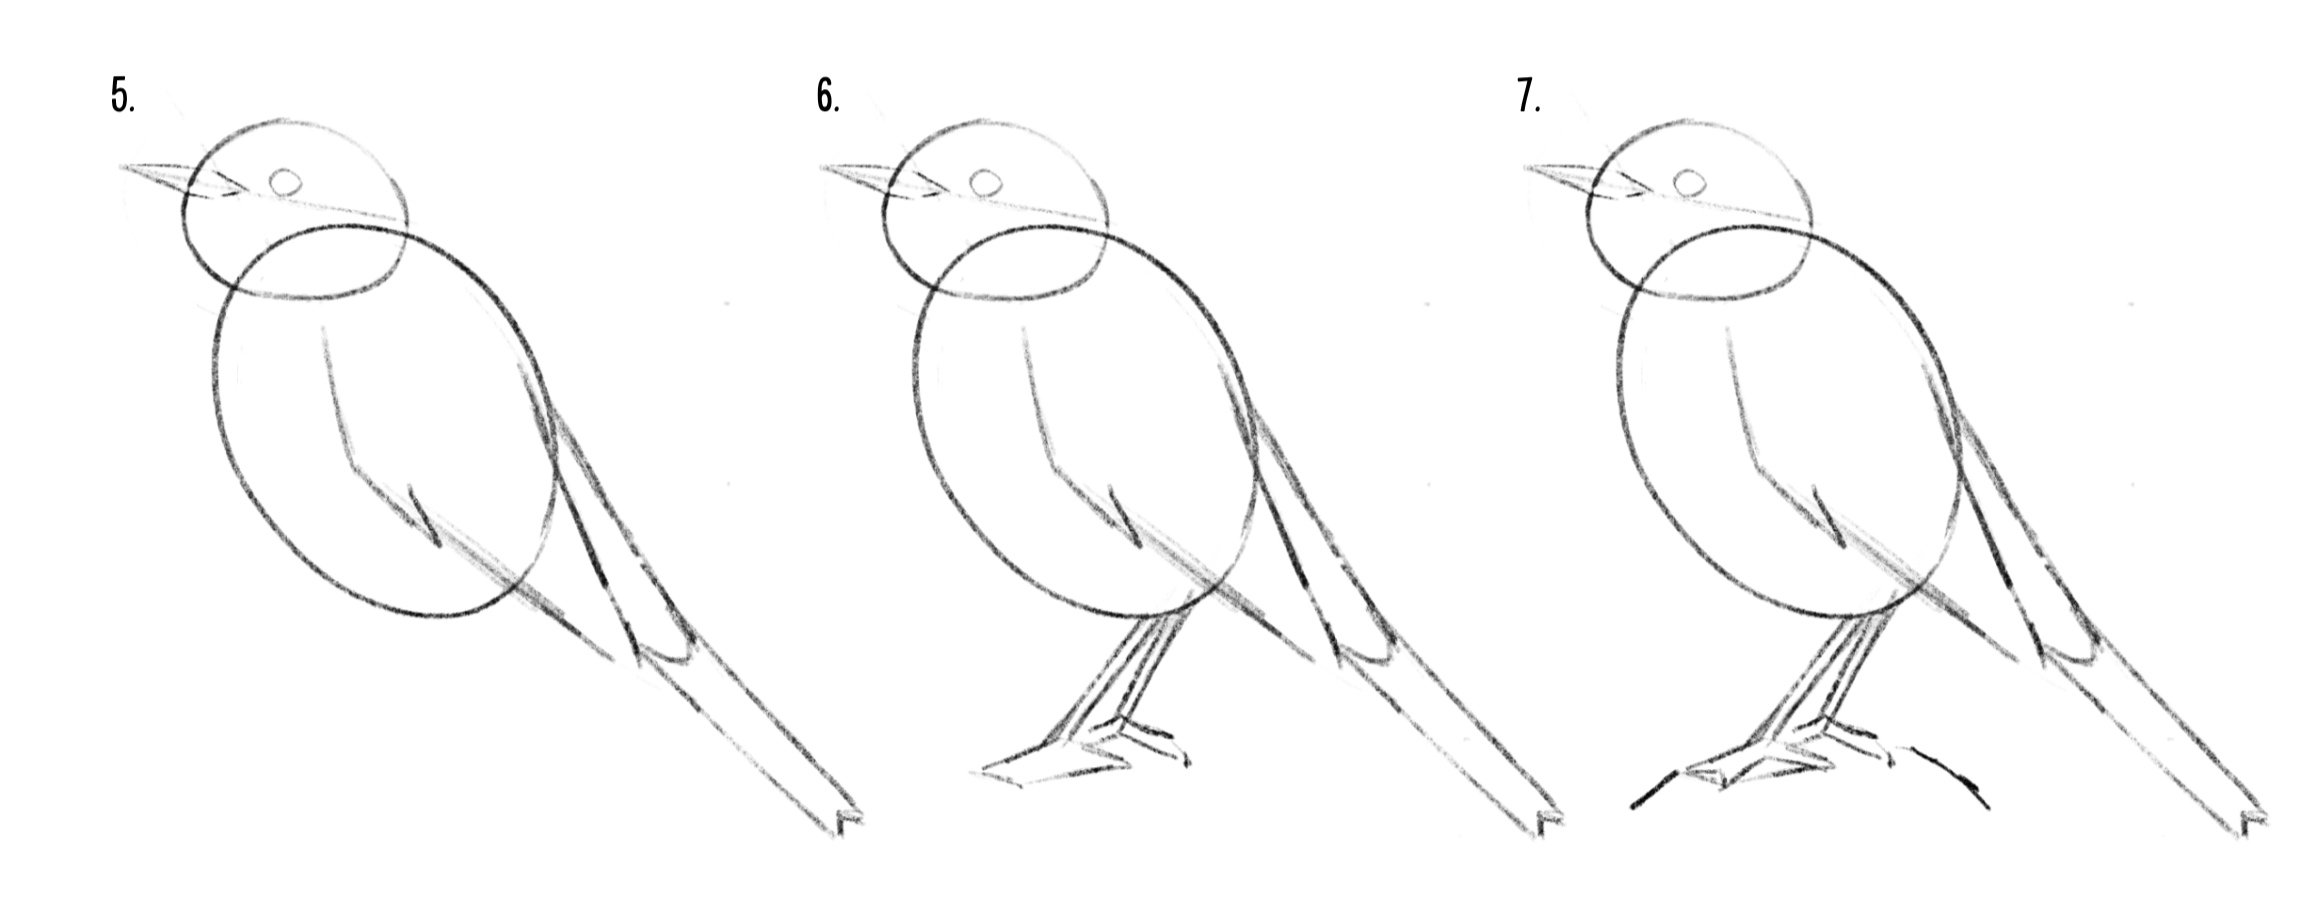
5. Tail: Often you will find a triangle where the tail and the body meet, or a rounded V-shape when looking at the tail from the front. In this bird we barely see the space where the tail and body meet, but we do still see a small indication of the v-shape feathered section that I am referring to. Sketch this shape in to give the proper angle from the body and then draw the tail, paying close attention to the angle of the tail. Use a simplified shape that you plan to correct later or draw it with the nuance you see in it.
6.Perch and legs: There are a few ways to approach this last portion of our sketch. The bird we are drawing is not flying, but it isn’t floating. So we need to add a place for it to perch in order to draw the legs and feet. There are a few ways to add the branch or surface where a bird is perched. One way is to simply estimate. This is not a bad system. Lightly sketch a line roughly where you visually estimate the perch to be, keeping in mind that if it is too close or too far away it will impact the length of the legs.
7. Or an alternative method is to look between the legs at the negative space. You can visualize the shape that is created by the space between the legs and perch, and draw this shape. (In this case a thin triangle.) The lower edge of the shape will be the perch or top of the feet, and show you how far from the bird these need to be drawn. The legs can also be drawn by this method of visualizing the shape of the negative space. The same shape you have drawn, if drawn to accurately match the image, will also provide the inside line of the legs. You can follow it by simply drawing the opposite side of each leg.
*The alternative to adding the legs this way is to simple measure and visualize the angles of the legs. This will often create a triangle that has the same helpful effect of helping you check your work. Draw these angled lines very lightly onto the bird, paying attention to where they connect to the body, and then finish by drawing your thin bird legs around these lines.
Feet: For today, we will draw a simplified version of the feet. Often, the position of a bird’s foot will visually appear to be a dark mass of toes rather than a foot with distinct features to pick out.
Using straight lines, simplify the overall shape of the foot, ignoring the space between any toes. Not only is this helpful in ensuring that the posture of the foot is correct, and makes it much easier to draw, but it’s a helpful way to observe the way the feet work to better understand how to draw them in the future.
Lastly, once again we go to the negative space. See how the space between our toes and our shape create a triangle? Recreate those triangles within the geometric shape we used to draw the foot and then erase the outer lines. Voila. C’est finit.
perfecting the outline
STEPS 8-10

Congratulations. You have finished your basic map sketch. However, these next steps are arguably the most important. The reason being that without it, using the basic shapes would make our drawing look less realistic, rather than more. Drawing with these basic shapes can really increase the accuracy of your drawings, UNLESS you get to this point and leave it as it is. We’ve used two ovals to capture the proportions and shape of our bird, but as is, it can be reminiscent of another object made with stacks of circles… a snowman! That is why I warn students against “the snowman bird.” For some reason it is very difficult for young students to remember not to leave the ovals from their sketch in the final drawing.
If we trace the outline of a snowman onto our bird image, we see very clearly that is not the shape of the bird. So, before doing any details or shading in our drawing, we must take a moment to refine the outline and shape of the bird. DO NOT FORGET THIS STEP. I know you’re ready to see this drawing come to life, but trust the process. If you leave this step off, you would be better off to draw by simply studying the outline.
Taking a close look at the reference photo, draw a line coming from below the beak to meet the body. Then study the angle at the front of the head that comes out of the beak and then the shape of the head. Finally, following the outline you observe in the photo, connect the head to the body oval along the outline, adjusting the size and shape as necessary.
Now, erase the leftover lines from the original shapes…Ahhh, that feels good. Doesn’t it?
The last step for part one will be to lightly mark out the various color changes along the body and major wing detail. This allows your brain to visualize the bird’s 3D form better. The brain needs surprisingly little to be able to fill in the missing information and understand what is going on. Think about the wing detail with the shape basic shape breakdown as the overall sketch. You are taking a larger, more complicated shape and breaking it down into smaller, simple shapes. You do not have to add every detail, just focus on the big shapes within the wing. Taking a moment to add in the wing detail will save you from having to stop and re-engage that part of your brain once you’ve moved on to the artistic, intuitive part of the drawing.
Whew, you did it!
Way to go, you’ve created your basic sketch. Now go have a cup of tea first, or move straight to part two of How to Draw Realistic Birds by clicking here!
Wait, there’s more!
You may be an adult, but that doesn’t mean you can’t watch the free video tutorials for kids from my Outschool class, here. Be sure two watch the learning video and the guided drawing video of a Black-capped Chickadee.
Or, get your copy of my children’s book about birds, Little Birder: A Field Guide to Birds of the Alphabet here.
Check it out!

Sometimes at this stage we have to trust the process even when it doesn’t feel like it is looking great. How do you feel about your sketch? Let me know in the comments below.
